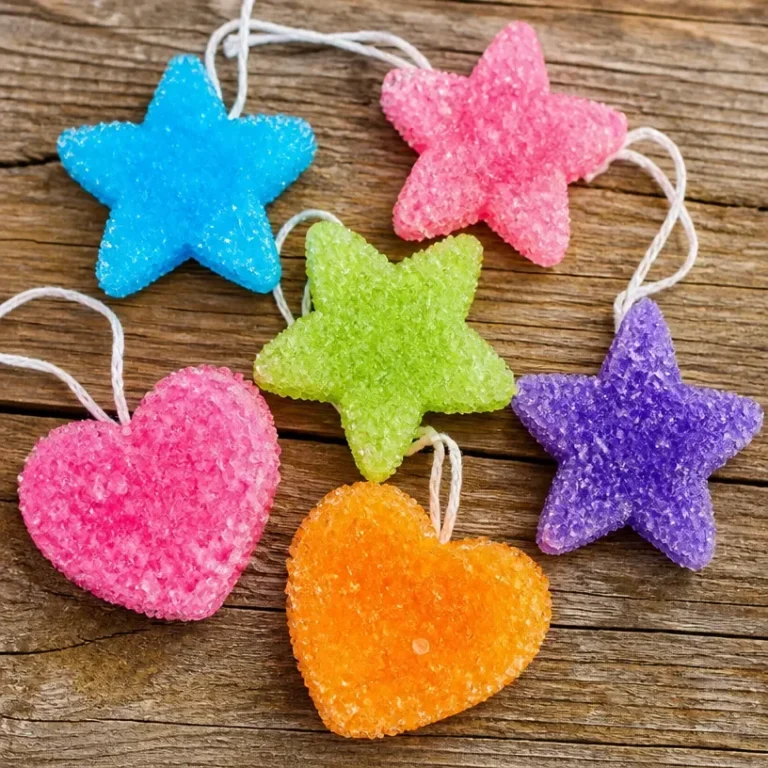


Growing Crystal Ornaments
Have you ever wanted to create your very own sparkling decorations at home? Growing crystal ornaments is a fun and educational science activity that lets you do just that! By using simple household materials, you can observe how crystals form and grow over time. The process combines creativity with scientific principles, making it the perfect hands-on learning experience for families or classrooms. You may also find Rainbow Crystal Garden Science Experiment Kids useful.
Not only will you watch the transformation of your ornament as crystals develop, but you will also gain insight into concepts such as saturation, crystal formation, and the properties of materials. This activity can spark conversations about science and nature that are both engaging and informative.
Why You’ll Love This Science Activity
- Hands-on Learning: Children actively engage with the process as they create their own crystal ornaments.
- Visual Results: Watching the crystals grow is fascinating and educational, making science come to life.
- Flexible Creativity: Use different shapes and colors to personalize your ornaments, encouraging artistic expression.
- Safe and Simple: The materials are commonly found around the house, making this an easy experiment for families and educators.
- Scientific Discovery: Learn about the science behind crystallization in a practical way, fostering curiosity and critical thinking.

Materials You’ll Need
To get started, gather the following supplies:
- Pipe cleaners or small wire frames: These will be shaped into the desired ornament forms.
- String or thin yarn: This will be used to suspend the ornament in the jar.
- Wide mouth jars: The jars hold the saturated solution and crystal ornament.
- Boiling water: To dissolve the borax or baking soda.
- Borax powder or baking soda: These will act as crystal-forming agents.
- Spoon for stirring: For mixing the borax or baking soda into the water.
- Measuring cup and spoons: For accurate measurements of water and borax/baking soda.
- Pencil or chopstick: To help suspend the ornament in the solution.
- Small tray or towel: To catch any spills.
- Safety gloves and goggles (optional): For extra safety when handling boiling water.
- Decorative ribbon or twine (optional): For finishing touches once the ornaments are complete.
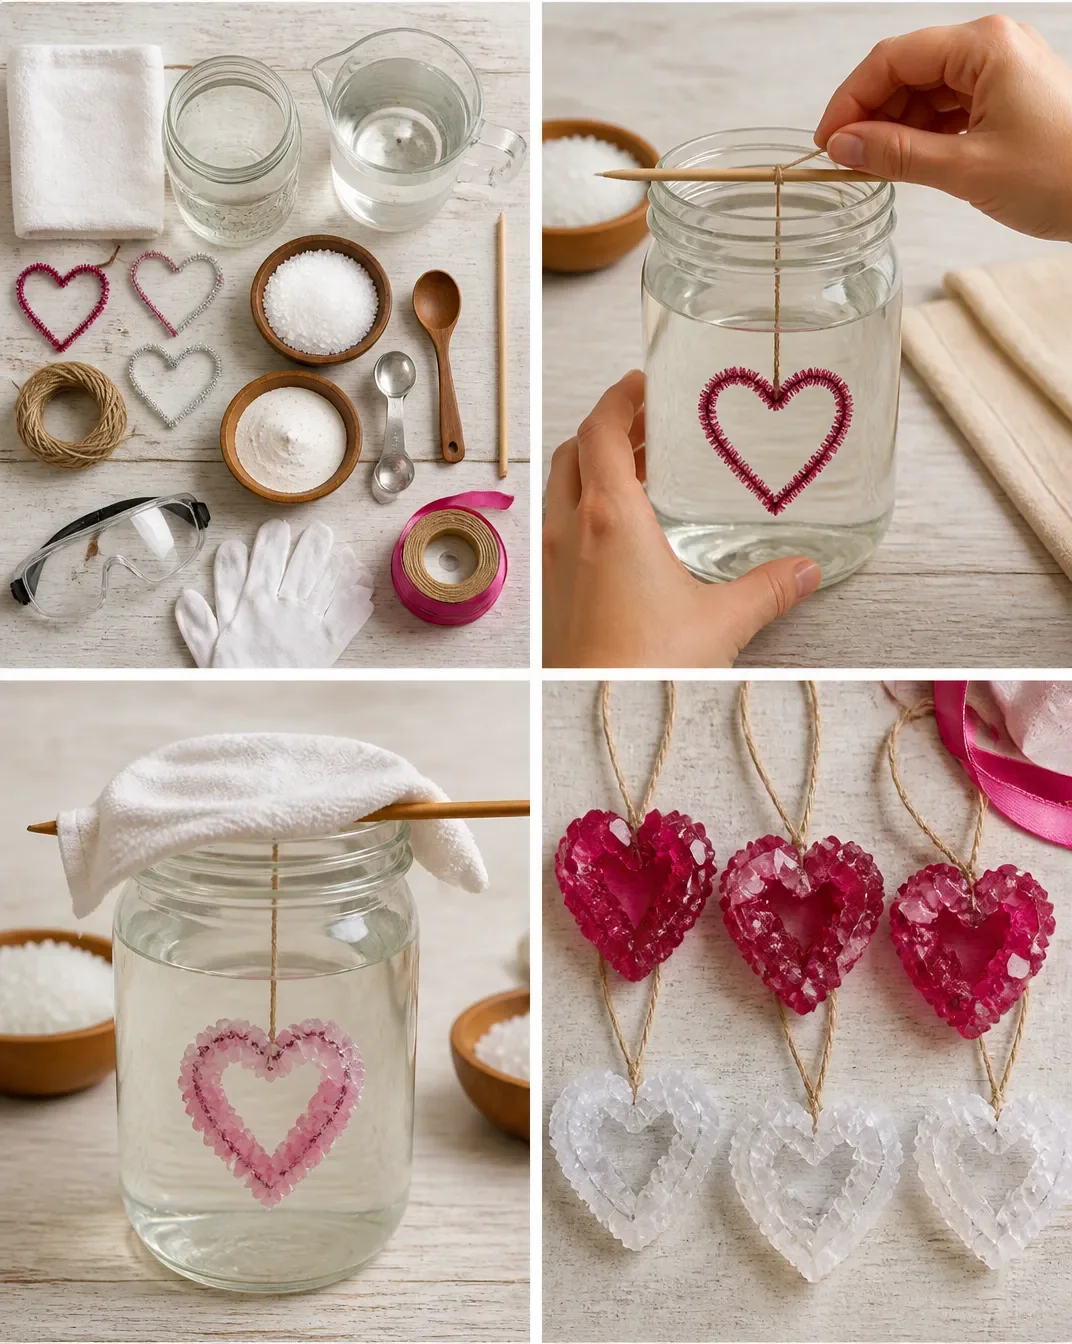
How to Do Growing Crystal Ornaments
- Shape Your Ornament: Start by shaping your pipe cleaner or wire into the desired ornament form, like a star, heart, or any creative shape you’d like.
- Boil the Water: Measure one cup of water and bring it to a gentle boil in a pot.
- Dissolve the Borax or Baking Soda: Slowly stir in borax or baking soda, one tablespoon at a time, until it no longer dissolves and the solution is saturated.
- Prepare to Hang: Tie your ornament to a string and loop the string over a pencil resting on the jar rim, making sure the ornament hangs without touching the sides of the jar.
- Submerge the Ornament: Lower the ornament into the warm solution while ensuring it is centered.
- Cover the Jar: Lightly cover the jar with a cloth to slow the cooling process, and place it somewhere still for a couple of hours.
- Wait for Crystal Growth: After the initial growth period, leave the ornament overnight to allow denser crystals to form.
- Remove the Ornament: To take out the ornament, lift the pencil while letting excess solution drip back into the jar.
- Optional Rinsing: If you want clearer crystals, you can briefly rinse the ornament in cool water.
- Final Touches: Once dry, tie a decorative ribbon and trim any sharp wire edges.
What Happens During the Experiment?
As the ornament sits in the saturated solution, the water begins to evaporate, leaving behind the borax or baking soda. Crystals start to form around the ornament as the solution cools. These crystals will grow larger over time, creating beautiful and intricate designs. You might notice the water level dropping as the crystals begin to take shape, resulting in stunning decorations that reflect light beautifully.
How It Works: The Science Explained
This activity demonstrates the process of crystallization, which occurs when a saturated solution cools. As water evaporates, the borax or baking soda molecules lose their ability to remain dissolved and start to bond together, forming solid crystal structures. These structures grow in size as more molecules join them, leading to the mesmerizing decorations you create. This teaches key scientific concepts, including solubility, saturation, and the formation of solids from liquids.
Helpful Tips
- Prepare Materials in Advance: Measure out your ingredients ahead of time to make the process smoother.
- Stability is Key: Make sure the jar is placed on a stable surface to avoid spills.
- Temperature Matters: Use freshly boiled water to ensure that you can fully dissolve the borax or baking soda.
- Experiment with Colors: Consider adding food coloring to the water to create vibrant crystal ornaments.
- Observe Carefully: Take notes on how the crystals change over time for an interactive learning experience.
Easy Experiment Variations
- Try Different Shapes: Create various designs, such as stars or snowflakes, to see how the shape affects crystal growth.
- Use Different Solutions: Experiment with different solutes like sugar or salt to observe how they crystallize compared to borax or baking soda.
- Change the Temperature: Test how cooling the solution at different rates impacts crystal growth, noting the differences.
- Color Experiments: Use varied food coloring amounts to explore how color intensity affects crystal appearance.
Doing This Experiment With Kids
Growing crystal ornaments is a fantastic activity for children, encouraging creativity and learning. It’s important for adult supervision during the boiling step and when handling hot liquids. Make sure children are aware of safety precautions when working with boiling water or sharp tools.
What Kids Can Learn
Through this activity, children will learn about the scientific methods of observation, experimentation, and documentation. They’ll explore concepts related to chemistry, such as solubility and crystallization, while developing skills in critical thinking and problem-solving. Ask them questions like, “What shapes do the crystals form?” or “How do the colors change as they grow?” to deepen their understanding.

Frequently Asked Questions
1. Can I use other materials besides borax?
Yes, you can also use baking soda or sugar, though they may produce different types of crystals.
2. What if my crystals didn’t form?
Ensure that your solution is saturated enough and that you’ve allowed adequate time for crystallization.
3. Is it safe for kids to do this experiment?
While the experiment itself is safe, adult supervision is advised when boiling water and handling materials.
4. How can I make my crystals clearer?
Rinsing the crystals briefly in cool water after pulling them from the solution can help improve clarity.
5. Why do the crystals grow at night?
The cooler evening temperatures promote better crystal growth by allowing the water to evaporate more slowly.
6. How can I preserve my crystal ornaments?
Once dried, keep them away from moisture, as humidity can cause them to dissolve again.
Conclusion
Growing crystal ornaments is not just an art project; it is a valuable science experiment that teaches kids about crystallization and other essential concepts. For another creative crystal-related project, check out How to Make Crystal Stars | Borax Crystal Ornaments for inspiration and further learning opportunities.
Explore more DIY science projects and hands-on STEM ideas.
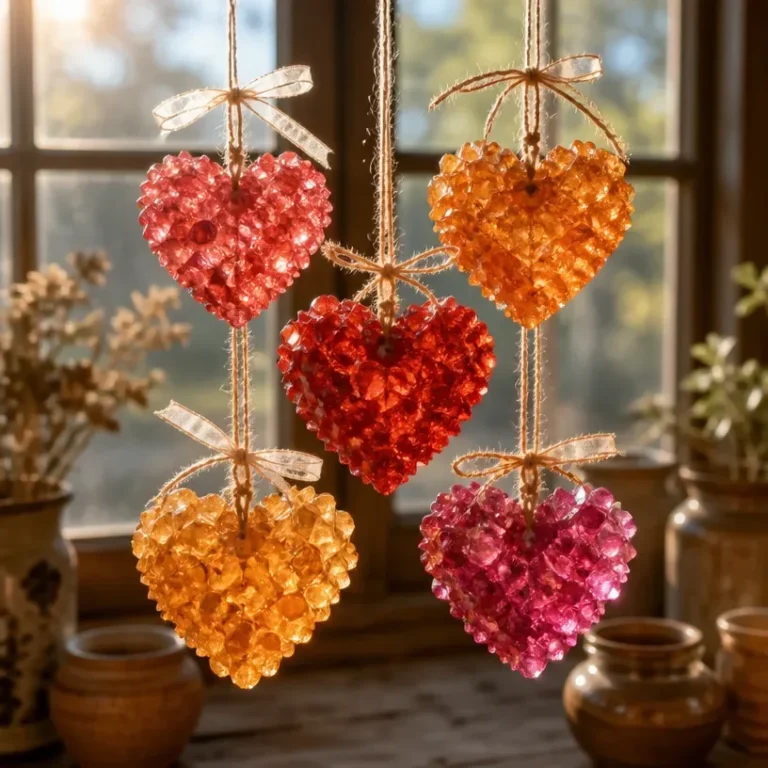
Crystal Ornaments
Would you like to save this project?
By submitting you agree to receive this project and occasional emails. Unsubscribe anytime.
Materials
Main Ingredients
- 1 cup Boiling water Freshly boiled to ensure proper dissolution.
- 3-6 tablespoons Borax or baking soda Use these as crystal-forming agents.
Materials
- 1 piece Pipe cleaner or small wire frame Shaped into desired ornament form.
- 1 piece String or thin yarn Used to suspend the ornament.
- 1 piece Wide mouth jar To hold the saturated solution and crystal ornament.
- 1 piece Spoon for stirring For mixing the borax or baking soda into the water.
- 1 piece Measuring cup and spoons For accurate measurements.
- 1 piece Pencil or chopstick To help suspend the ornament.
- 1 piece Small tray or towel To catch any spills.
- optional piece Safety gloves and goggles For extra safety when handling boiling water.
- optional piece Decorative ribbon or twine For finishing touches once the ornaments are complete.
Directions
Preparation
- Shape your ornament by bending your pipe cleaner or wire into a desired form.
- Measure one cup of water and bring it to a gentle boil.
- Slowly stir in borax or baking soda, one tablespoon at a time, until the solution is saturated.
- Tie your ornament to a string and loop the string over a pencil resting on the jar rim.
- Lower the ornament into the warm solution, ensuring it is centered and does not touch the jar sides.
- Cover the jar lightly with a cloth to slow the cooling process and place it in a still location.
- Leave the ornament overnight to allow denser crystals to form.
Finishing
- Lift the pencil to remove the ornament, letting excess solution drip back.
- Briefly rinse the ornament in cool water for clearer crystals.
- Once dry, tie a decorative ribbon and trim any sharp wire edges.
Last Step: Don’t forget to leave a rating and comment below! It helps other readers find the best DIY projects — and it helps us too!